

In a world where attention spans are shrinking and information overload is the norm, dynamic presentations are no longer a luxury—they’re a necessity. While static slides with text and images can get the job done, a well-placed video can transform a good presentation into an unforgettable one. It can explain a complex concept, show a product in action, or simply add a touch of personality and energy. But how do you seamlessly integrate a YouTube video into your slideshow? You might be tempted to just paste a hyperlink, but that’s a surefire way to break your flow and lose your audience’s attention. The right way to do it is to embed the video directly into your presentation. This guide will walk you through the simplest and most effective methods to add a YouTube video to a Microsoft PowerPoint presentation. It will ensure your next presentation is both professional and engaging.
Method 1: Insert a YouTube Video Using Its URL
This is the most straightforward and effective method for most modern versions of PowerPoint, including Microsoft 365, PowerPoint 2013, 2016, 2019, and beyond.
Note: The version of PowerPoint used in this article is Office 365, and options may vary in other versions. The template used in the article can be downloaded for free from Mslides.

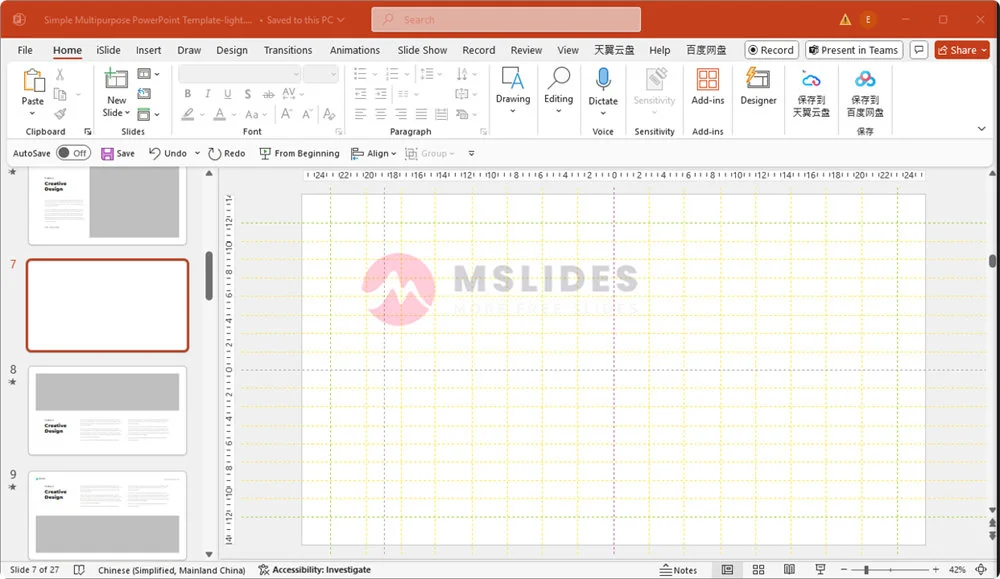
Step 1: Open Your Presentation and Select a Slide
The first thing to do is open the presentation where you want to add the video. Navigate to the specific slide that will host your content. It’s good practice to create a new, dedicated slide for the video to ensure it has enough space and isn’t crammed in with other elements. A clean slide with just a title and the video player looks professional and helps your audience focus.
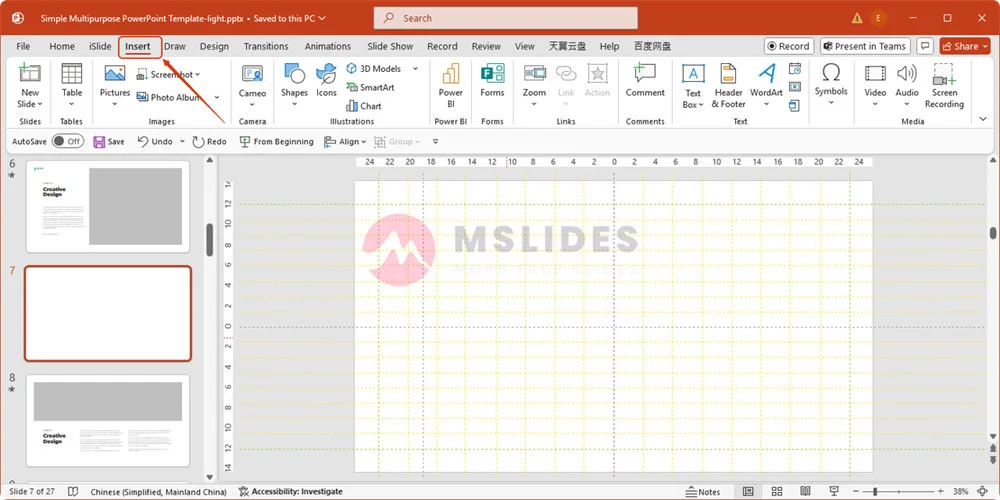
Step 2: Go to the ‘Insert’ Tab
In the top menu ribbon, you’ll see a series of tabs. Click on the Insert tab. This tab is your creative toolbox, holding all the commands for bringing external content into your presentation, from charts and SmartArt to icons and, most importantly, videos.
Step 3: Click ‘Video’ and Choose ‘Online Video…’
Look to the far right of the Insert ribbon. You’ll find a Video icon, with a small picture of a film strip. Click this icon, and a dropdown menu will appear. You’ll see 3 options: “This Device…”, “Stock Videos…”, and “Online Video….” Select Online Video….
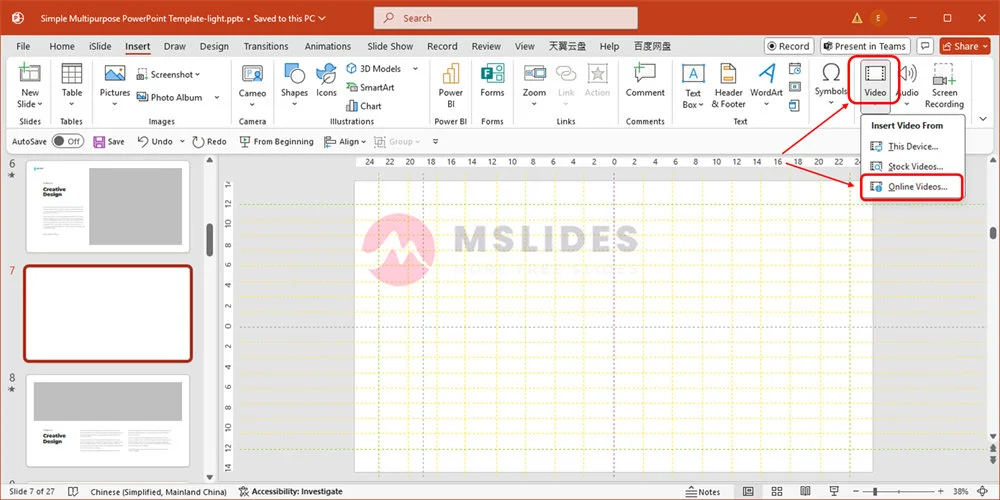
This action will open a dialogue box that acts as a bridge between your presentation and the vast world of online video.
Currently, Microsoft 365’s PowerPoint supports inserting online videos from three platforms: YouTube, SlideShare, and Vimeo.
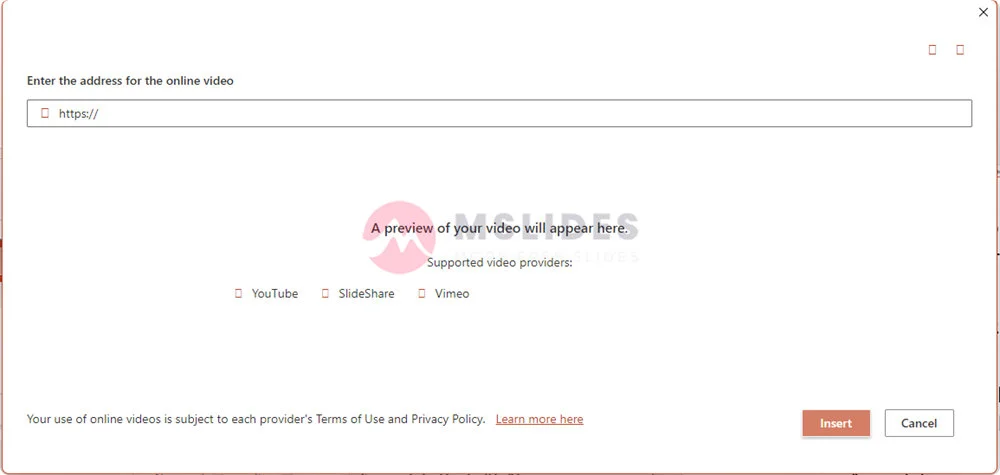
Step 4: Paste the YouTube Video URL
Now, you need the URL of the YouTube video you want to use. Go to the YouTube video in your web browser and copy the URL directly from the address bar.
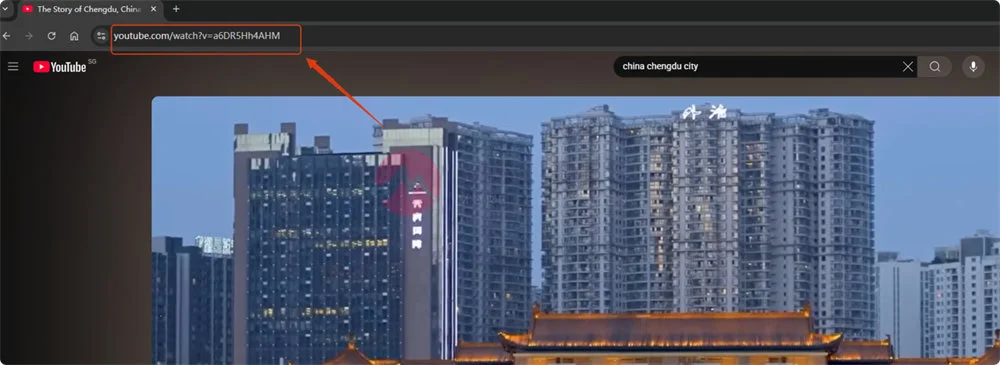
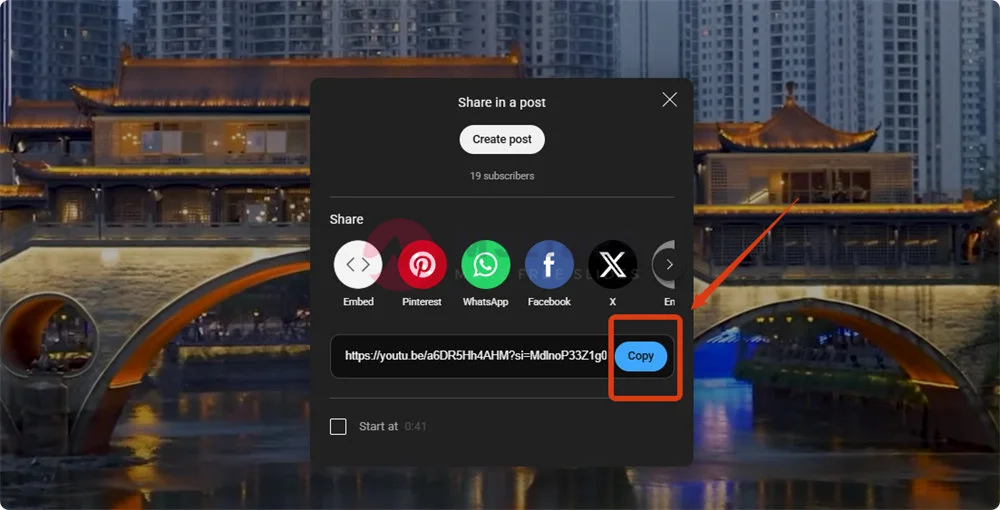
A quick tip: you can also click the “Share” button below the video and copy the link from there.
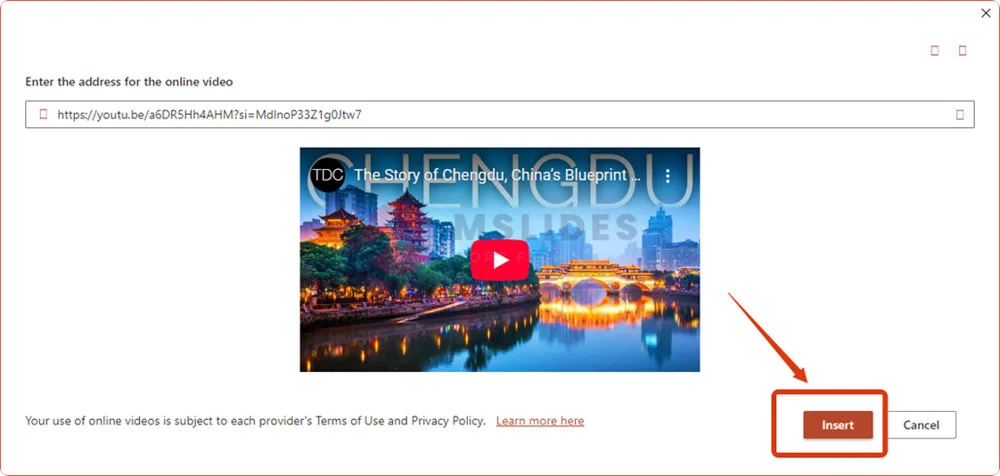
Once you have the link, paste it into the search box in the dialogue box. PowerPoint will automatically fetch a preview of the video. This is a great way to confirm you have the right one before you insert it. After the preview loads, click the Insert button.
Step 5: Position and Resize Your Video
In a matter of moments, a video player will appear directly on your slide. It will be a placeholder showing a thumbnail of the video. You can now click and drag the player to move it to a central or preferred position. To change its size, click and drag the circles or squares on the corners and sides of the player.

A pro tip: Hold down the Shift key while dragging a corner to resize the video proportionally, preventing it from looking stretched or squashed.
Once the video is in place, you’ll notice a new set of context-specific tabs appear in the menu ribbon at the top: Video Format and Playback. We’ll dive into what you can do with those next.
Method 2: Insert a YouTube Video Using Embed Code
While the “Online Video” feature is the easiest method for most users, there might be times when you need more control over how the video is displayed. This is where the embed code comes in. Using the raw HTML embed code from YouTube gives you the power to customize the video’s appearance and behavior, such as hiding the player controls or preventing related videos from showing at the end.
Step 1: Get the Embed Code from YouTube
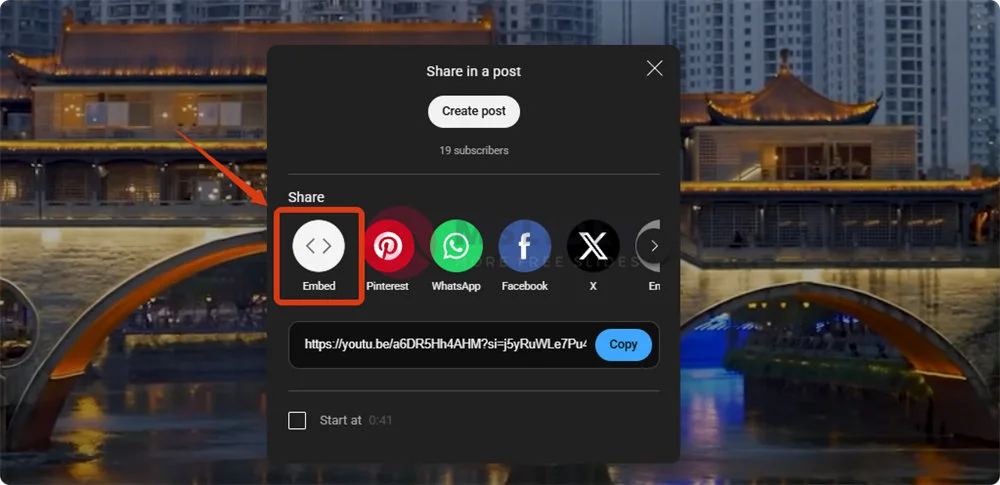
Go to the YouTube video you want to embed. Below the video player, click the Share button. A pop-up window will appear with various sharing options. This time, instead of just copying the URL, click on the Embed option.
This will bring up a block of HTML code, along with a visual preview of the video. You’ll also see a series of checkboxes below the code. This is your chance to customize the video before you even put it in your presentation. For example, you can choose to:
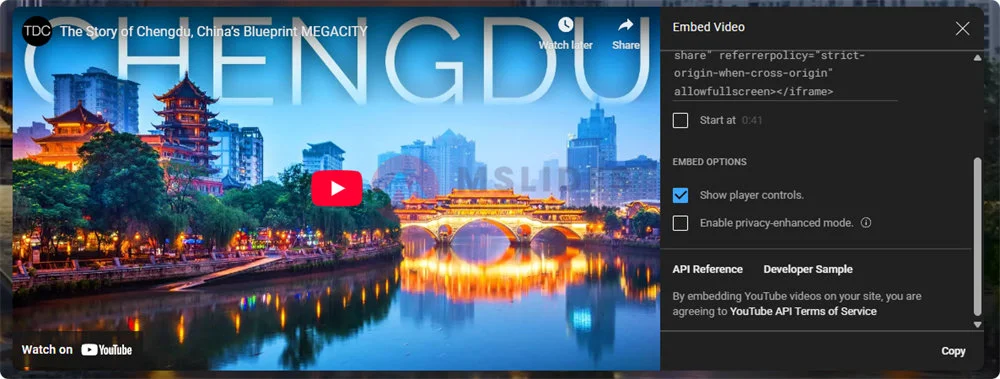
After you’ve made your selections, simply click the Copy button on the bottom right to copy the entire block of code.
Tip: You can customize your embed code using YouTube API parameters like autoplay, start, end, or modest branding (reduced YouTube logo display).
Step 2: Insert the HTML embed code into PowerPoint
In Microsoft PowerPoint, navigate to the Insert tab on the ribbon. In the Media group, click on Video, and then select Online Video… from the dropdown menu. In the dialog box that appears, paste the provided HTML embed code into the designated field.
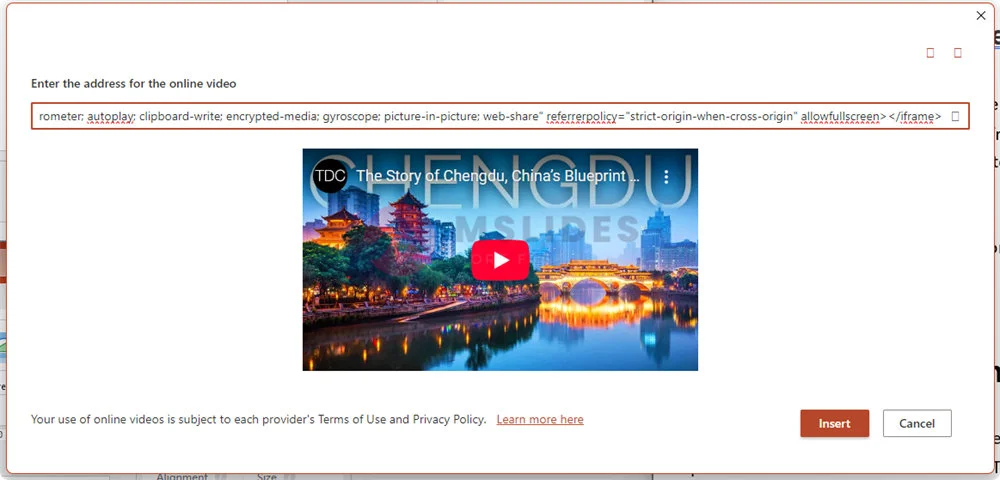
After inserting the video, you can resize or reposition the video on your slide.
A Third Option: Inserting a Video from Your Computer
What if you don’t have an internet connection during your presentation? Or what if you’re using a private video that isn’t on YouTube? The solution is to insert a video file directly from your computer.
Want to download YouTube videos for free? Click here to read more.
Step 1: Get Your Video File Ready
Make sure the video file you want to use is saved on your computer. Common formats like MP4, MOV, and WMV are all compatible with PowerPoint.
The video formats supported by PowerPoint are shown in the table below:
| Systems | Supported Video Formats | Recommended Formats |
|---|---|---|
| Windows | .asf, .avi, .mp4, .m4v, .mov, .mpg, .mpeg, .wmv | .mp4 |
| MacOS | .avi, .vfw, .mp4, .mpg4, .m4v, .mpg, ,mpeg, .mpe, .m75, .m15, .m2v, .ts, .mov, .qt, .dif | .mp4 |
| IOS | .mp4, .mov, .m4v, .mpg, ,mpeg | .mp4 |
| Android | .mp4, ,mkv | .mp4 |
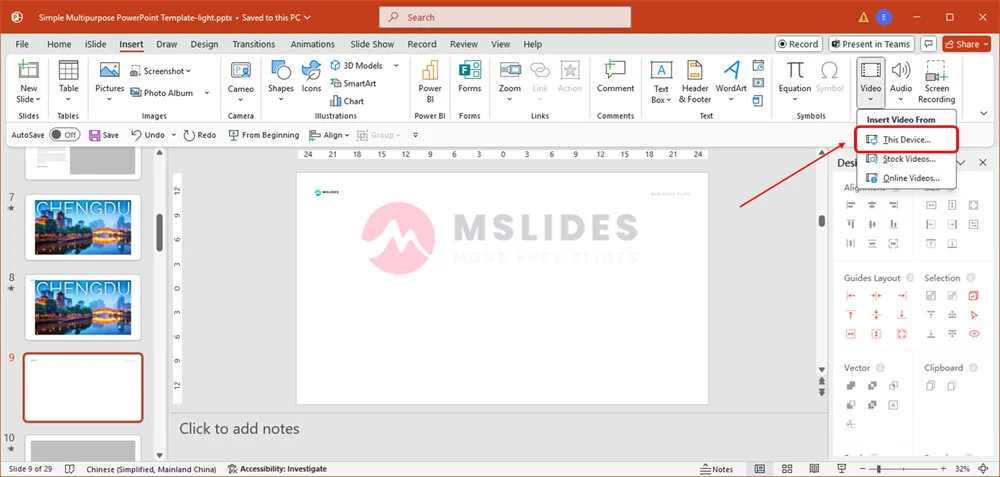
Step 2: Follow a Similar ‘Insert’ Path
Just as before, go to the Insert tab and click on the Video icon. This time, instead of choosing “Online Video,” select This Device… (or Video on my PC).
Step 3: Find and Select Your Video File
A file browser window will open. Navigate to the location on your computer where your video is saved, select the file, and click Insert. The video will appear on your slide, ready to be resized and positioned.

Comparison of Methods: Pros and Cons
Choosing the right method is crucial for a smooth presentation. Here’s a quick breakdown to help you decide.
| Method | Pros | Cons |
|---|---|---|
| YouTube Video (Online) | Always up-to-date content; Keeps your file size small: Easy to find and use. | Requires a stable internet connection; Could be subject to ads or external links. |
| Video from Computer (Local) | Works completely offline; No ads or external distractions; Full control over the video’s content. | Drastically increases your PowerPoint file size; You must have the video file with you (on the same device or a flash drive). |
4 Pro Tips for a Polished Presentation
Simply inserting a video isn’t enough. Here’s how to make it truly shine:
- Add a Transition or Animation: To make the video’s appearance more professional, add a fade-in animation or a smooth transition to the slide.
- Consider Video Quality and Relevance: Always use high-quality videos that are directly relevant to your topic. A pixelated or off-topic video can detract from your message.
Summary
Adding a video to your PowerPoint presentation is a powerful way to captivate your audience and elevate your content. Whether you’re using the simple online Video feature to stream from YouTube or embedding a local file for offline access, the process is straightforward and the results are well worth the effort.
By following these steps, you can avoid technical hiccups and focus on delivering a memorable and impactful message.
FAQs
Q: Can I play a specific part of the YouTube video instead of the whole thing?
A: No, you can’t do that directly. You need to download the desired YouTube video first and then insert it into PowerPoint. This way, you’ll be able to trim the video. After you’ve inserted the video, click on it and go to the Playback tab in the ribbon. Then, click the Trim Video button. A dialog box will appear, allowing you to set the exact start and end points for the video.
Q: Why is my embedded YouTube video showing related videos at the end?
A: This is the default behavior for embedded videos. And you cannot disable this function.
Q: What if my PowerPoint file becomes too large after I insert a video?
A: If you use the “Video from Computer” method (Method 3), your file size will increase significantly. To manage this, you can compress the media. Go to File > Info and look for the Compress Media button. This can dramatically reduce the file size without a noticeable loss in quality.
Q: Can I change the poster frame (the thumbnail image) of the video?
A: Yes, you can. With the video selected, go to the Video Format tab. You’ll see a Poster Frame button. You can choose a frame from the video itself or select an image from your computer to use as the thumbnail that appears before the video starts playing.
Q: Why is the video lagging or not playing smoothly?
A: This is usually a performance issue. If you’re using the online video method, a slow internet connection is the most common culprit. If you’re using a local file, it could be a large file size, a low-quality video card, or too many other programs running in the background. Closing other applications can often help.
Q: Can I add a border or shadow to my video player?
A: Absolutely. After inserting the video, select it and go to the Video Format tab. Here, you can find a variety of styles, shapes, and effects. You can add a border, apply a shadow, give it a 3D effect, or even apply a circular shape to the player.
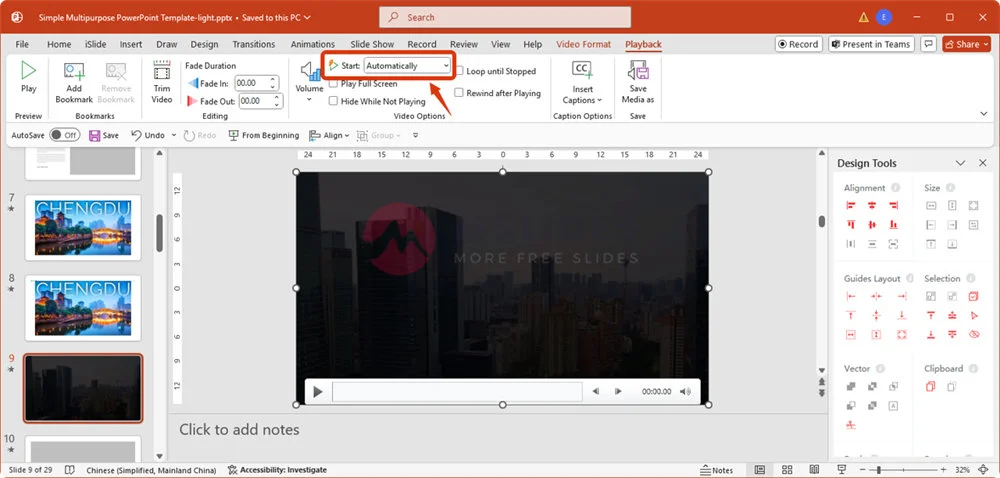
Q: Is there a way to make the video autoplay when I advance to the slide?
A: Yes, this is a simple setting. With the video selected, go to the Playback tab. Look for the “Start” option. The default is “In Click Sequence,” but you can change it to “Automatically” so the video begins playing as soon as you get to that slide.
Q: Can I add a hyperlink on top of the video that links to a different page?
A: No, you can’t place a hyperlink on top of the embedded video player itself. However, you can add a shape, picture, or text box next to or below the video and hyperlink that instead.
Q: What video file types are compatible with PowerPoint?
A: For the “Video from Computer” method, PowerPoint supports a wide range of video formats. The most common and recommended formats are MP4, WMV, and MOV, as they are highly compatible and offer a good balance of quality and file size.
Q: I see a black screen instead of a video. What’s wrong?
A: A black screen often indicates a playback issue. First, ensure you have an active internet connection if you’re using an online video. If you’re using a local file, the video may be corrupted, or your computer is missing the necessary codec to play it. In that case, re-encoding the video to a common format like MP4 can solve the problem.