

PowerPoint is a great tool when it comes to designing a presentation. We can use PowerPoint to make a simple deck of slides, or we can make a visually breathtaking course of animations and graphics. PowerPoint gives us many features that allow us to make various types of presentations. But it is not a perfect tool! Sometimes, we need more features to complete some special slides or boost PowerPoint productivity. You may need to install some PowerPoint add-ins. What’s more, adding an Add-in in PowerPoint is quite easy!
You can install PowerPoint add-ins with a few simple steps. Firstly, click on the “Insert” tab, and then click “Get Add-ins”. And then, a window will pop up. Secondly, Find the add-in you want to install. You can find add-ins you need by categorizing or searching. At last, click “Add” and then click “Continue” after finding the add-in you need. the add-in will be added to your PowerPoint.
In addition to installing add-ins in the Office Store, we can also install third-party add-ins in PowerPoint. There are two kinds of third-party add-ins you can install in PowerPoint, COM add-ins and PowerPoint add-ins.
Installing some add-ins in PowerPoint will add more functionality for us or make us more efficient at making presentations. In this article, we will look at everything there is to know about add-ins in PowerPoint. We shall learn how to find and install add-ins, how to manage or remove add-ins, how to enable or disable add-ins, and much more! I’ll also share a few best free add-ins you should install in PowerPoint.
Before starting, you can download this free template used in this article.
Because there are many skills about how to install add-ins in PowerPoint, this guide covers quite a lot of ground! It’s a long read, so feel free to use the table of contents below to jump around.
let’s get started!
1. What are add-ins in PowerPoint?
Add-ins in PowerPoint are supplemental applications that provide additional functionality that is either not present in PowerPoint or too cumbersome to carry out traditionally.
1.1 why should you use add-ins?
There are many benefits to using add-ins in PowerPoint. Each add-in will provide one or more functions. For example, in the article about how to insert online pictures in PowerPoint published earlier, I recommended 3 add-ins for inserting online pictures, you can use them to find and insert online images into your presentation in PowerPoint quickly. Other than that, you can get additional functionality like adding a countdown timer, inserting live web pages, adding icons to your slides, and much more!
1.2 two kinds of add-ins
You can get more than 200 add-ins from Office Store in PowerPoint. However, that’s not all add-ins you can install in PowerPoint, you can also download more add-ins on other sites. Most of these add-ins are not the same as add-ins from Office Store, they belong to another type of add-in, called COM add-ins. the add-ins you get from Office Store are PowerPoint add-ins.
1.2.1 PowerPoint add-ins
All add-ins you can get from Office Store in PowerPoint are PowerPoint add-ins. In general, some of these add-ins will add one or a few options to the Home tab or the Insert tab. Some of them will add a tab in your PowerPoint ribbon, like Script Lab. For some other add-ins, you can’t find any options, you should click on the “My Add-ins” option and then click “Add” to use them.
1.2.2 COM add-ins
Most of the third-party add-ins are COM add-ins. When you download these add-ins, you will get software that can be installed like other software. In general, these plugins will add a tab that includes many options to the PowerPoint ribbon. They are more complicated than PowerPoint add-ins.
In this article, we will focus on installing PowerPoint add-ins in PowerPoint. We also focus on how to manage all add-ins in PowerPoint.
1.3 Are Addins Free in PowerPoint?
You can use most PowerPoint add-ins for free in PowerPoint. Some of them are completely free. At the same time, some of them adopt a freemium model, which means, you can install them for free with some basic features, but you need to pay to access the premium features. Besides, a few add-ins in PowerPoint require you to pay to use it.
Although some third-party add-ins are free, like BrightSlide, most third-party add-ins require you to pay to use them. So, before you need to buy such an add-in, you’d better confirm that the plugin supports your software, and if the plugin offers a trial, you’d better consider whether you need to buy the plugin after trying it for a few days.
2. How to install add-ins in PowerPoint?
You can install add-ins from Office Store in PowerPoint. But in some cases, we need to install third-party add-ins from other websites.
2.1 how to install add-ins from Office Store in PowerPoint?
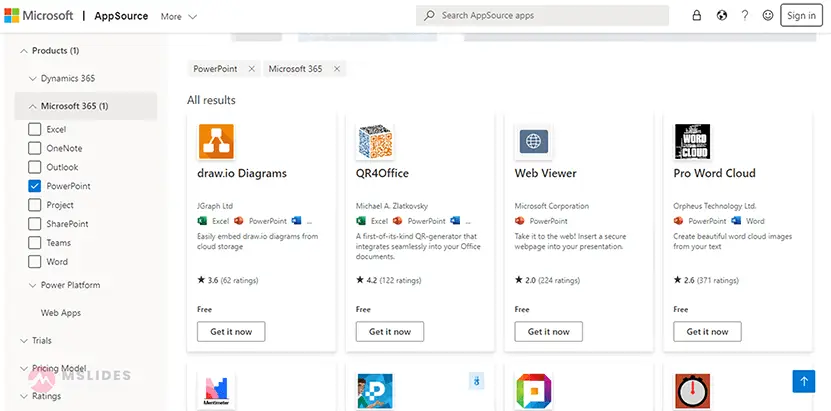
Microsoft has a dedicated Office Store which lists all add-ins available for all Office applications. You can get information like description, rating, pricing model, and much more about these add-ins in Office Store.
In general, we do not need to access the Office Store in our browser to download PowerPoint add-ins. We can install Add-ins in PowerPoint directly. You can follow the four steps described below to install an Add-in in PowerPoint.
Step 01: Open the Office Add-ins window
Click on the “Insert” tab. And then click on the “Get Add-ins” button. It is the first button in the “Add-ins” section of the “Insert” tab.

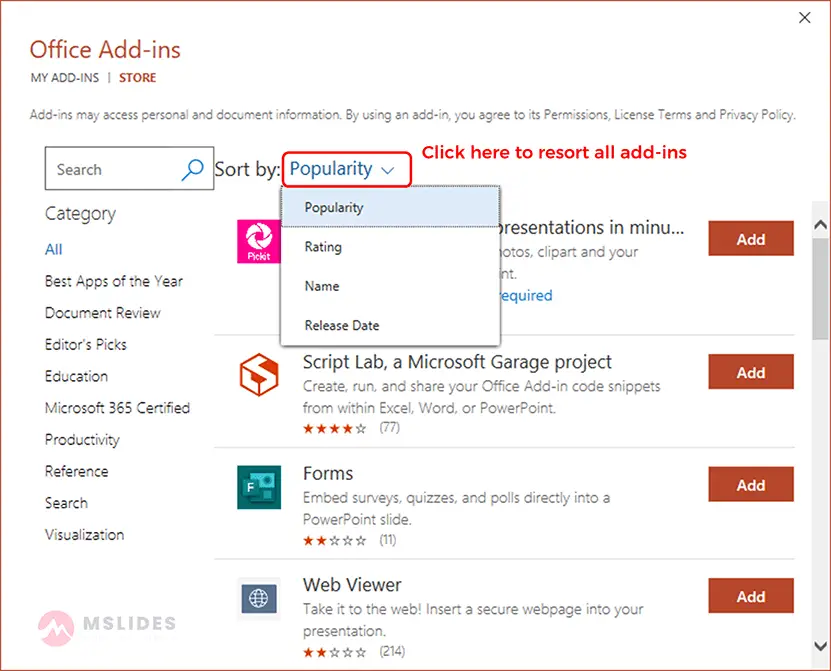
Step 02: Find your preferred Add-in
After opening the Office Add-ins window, you’ll find out all add-ins for PowerPoint in the Office Store. You can search or click on the categories to find your preferred Add-ins. Then, select the orange “Add” button to the right of the Add-in.
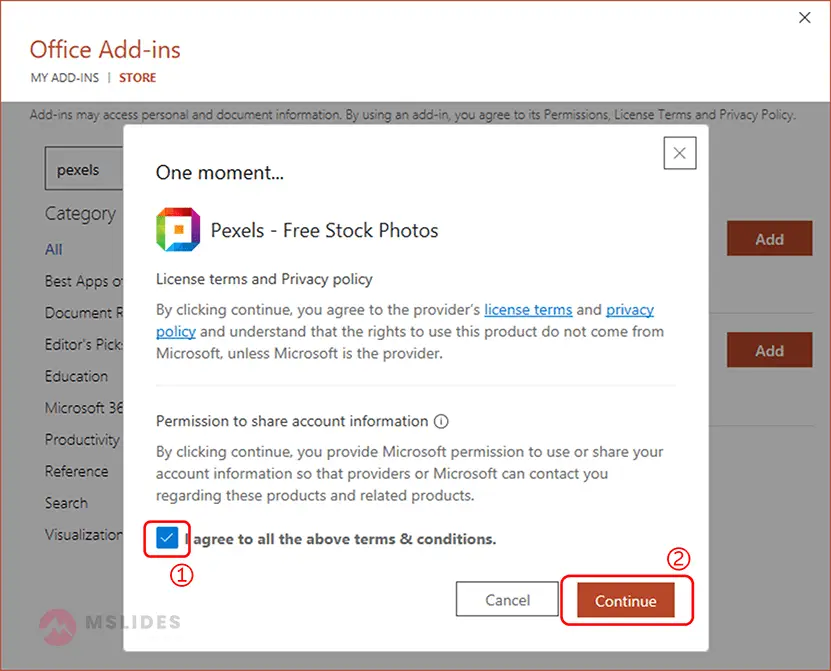
Step 03: Continue to install the add-in
After you click on the “Add” button, another pop-up window will emerge. You can check more information about this add-in through this window. Click on the check box to agree with all the terms and conditions of installing the Add-in and then hit the “Continue” button located at the bottom right corner of the pop-up window.
At this moment, we have successfully installed the add-in “Pexels”. Now you can insert online pictures from pexels.com in PowerPoint without downloading any pictures.

Please note that when we install an add-in in PowerPoint, the add-in may add some options to PowerPoint tabs, and other options in these tabs may be auto-adjusted according to the width of your screen. For example, I have installed the add-in “Pexels”, and it add an option named “Open Pexels” in the Insert tab. And then the “add-ins” section in the Insert tab is folded automatically.
The Pexels add-in is a great tool to insert stock photos in your presentations in PowerPoint. You can adjust the width of this add-in if you want to view more pictures.
2.2 Install third-party add-ins
Most third-party add-ins are COM add-ins, and you can install these add-ins just like any other software. Sometimes, there are situations where you need to install third-party PowerPoint add-ins. The suffix of these add-ins is .ppam or .ppa.
In this situation, you should follow the 4 easy steps described below to install a third-party PowerPoint add-in in your PowerPoint presentation.
Step 01: Click on the “Insert” tab
After you click on the “Insert” tab, you’ll find out an option named “My Add-ins”. There is a dropdown on the right side of the “My Add-ins” option.

Step 02: Open the “Manage Other Add-ins” window
Click on the dropdown on the right side of the “My Add-ins” option, you’ll find out the add-ins you used recently and the “Manage Other Add-ins” option. Click on the “Manage Other Add-ins” option, and a pop-up window emerges.
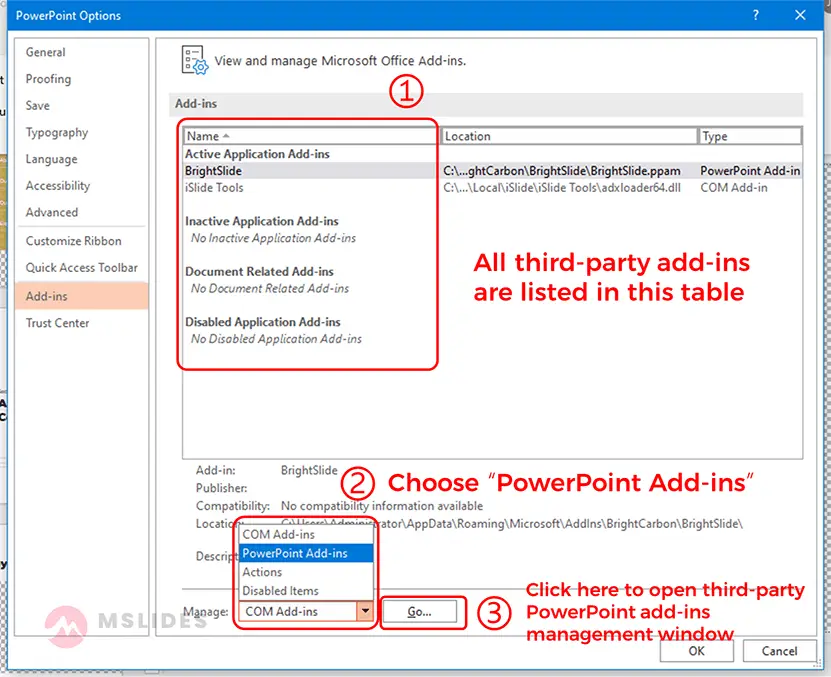
All third-party add-ins including COM add-ins and PowerPoint add-ins installed are listed in the window. At the bottom of the window, click on the dropdown under the “Manage” section. Then, from the dropdown, click on “PowerPoint Add-ins”, and click on “Go”.
Step 03: Manage third-party PowerPoint add-ins
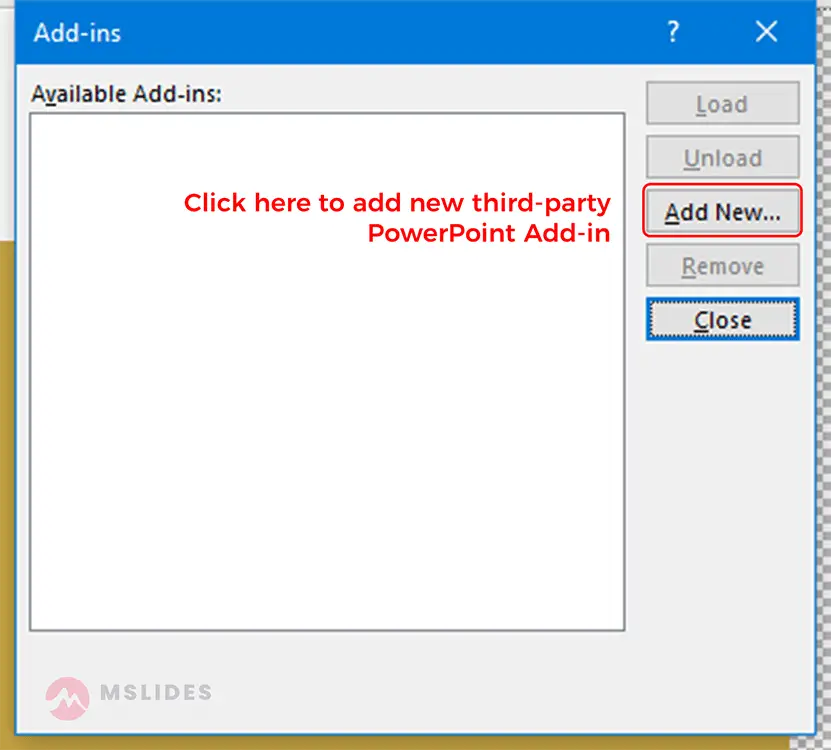
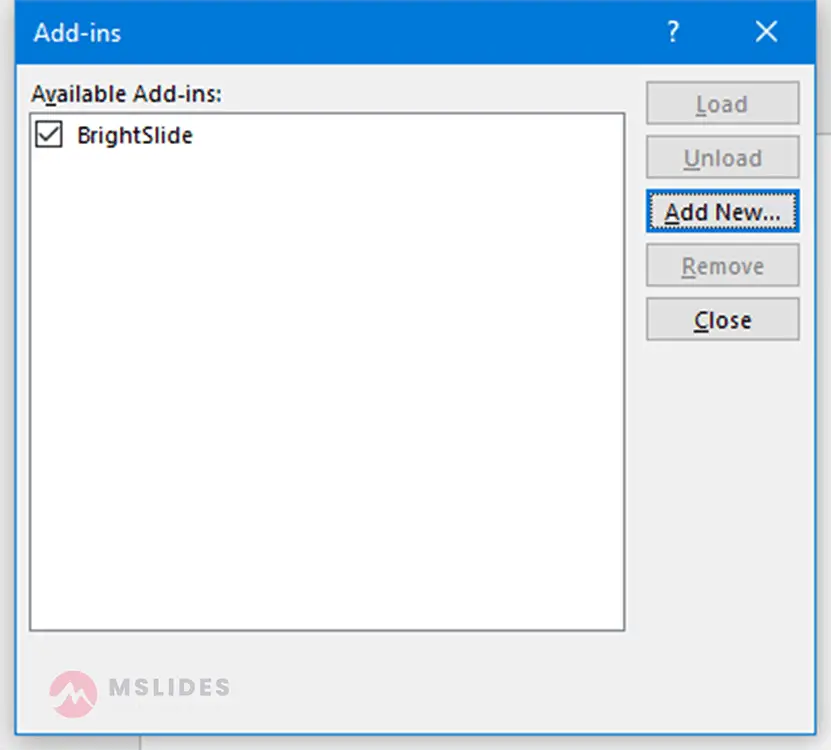
After you click on “Go”, another window will pop up. In this pop-up window, all third-party PowerPoint add-ins are listed in this window, you can manage them, and you can also install new a new add-in by clicking on the “Add New” option.
Please note you can only manage the third-party PowerPoint Add-ins in this window. All add-ins added from Office Store will not be listed in this window.
Step 04: Add new add-ins
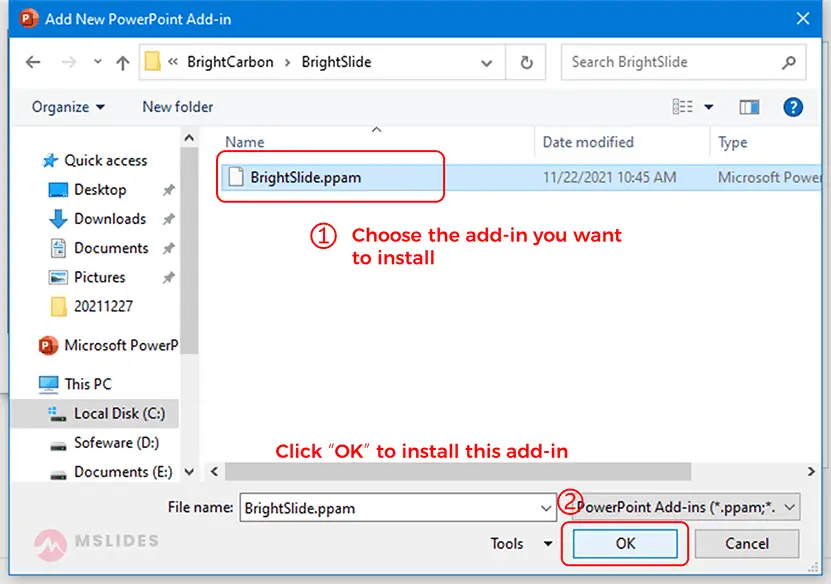
After you click on the “Add New” option, the file explorer on your computer will open. Browse to the location where you have saved the third-party add-in. Click on it to select it, and then click “Ok“.
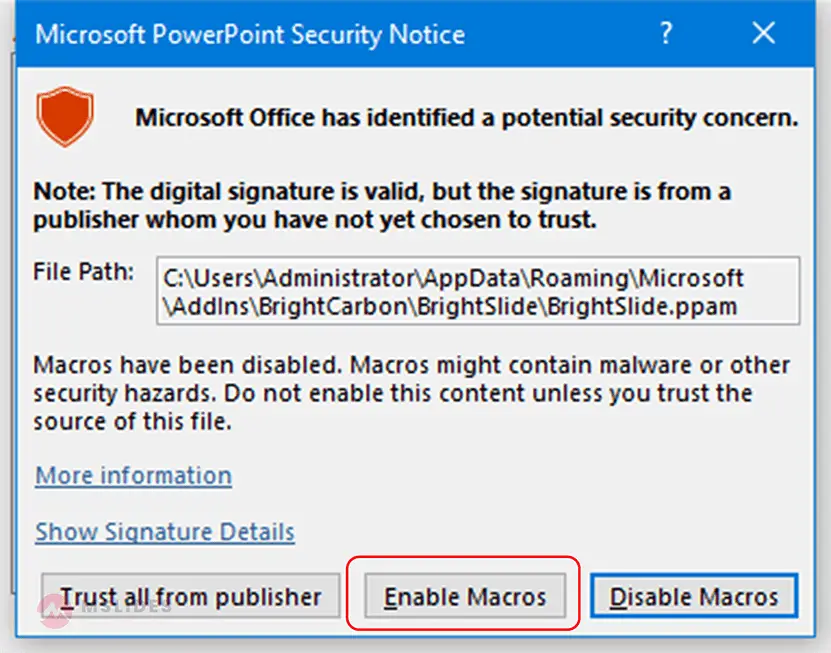
You may be prompted with a security notice. Click on “Enable Macros” and then the add-in will be installed on PowerPoint.
After you install the add-in successfully, the add-in will be listed in the PowerPoint add-ins management window.
That’s it! You have already successfully installed a third-party add-in to your PowerPoint. You can use it now.
3. How to manage and remove your Add-ins in PowerPoint?
Sometimes, we don’t like the add-in that we installed, or the add-in that you added doesn’t fulfill the purpose. And, adding too many add-ins will make the PowerPoint software slower, so you need to know how to manage and remove add-ins.
3.1 How to manage PowerPoint add-ins added from Office Store?
If you don’t want to use an add-in added from Office Store anymore, you can remove it from PowerPoint. There are two methods to remove the add-in.
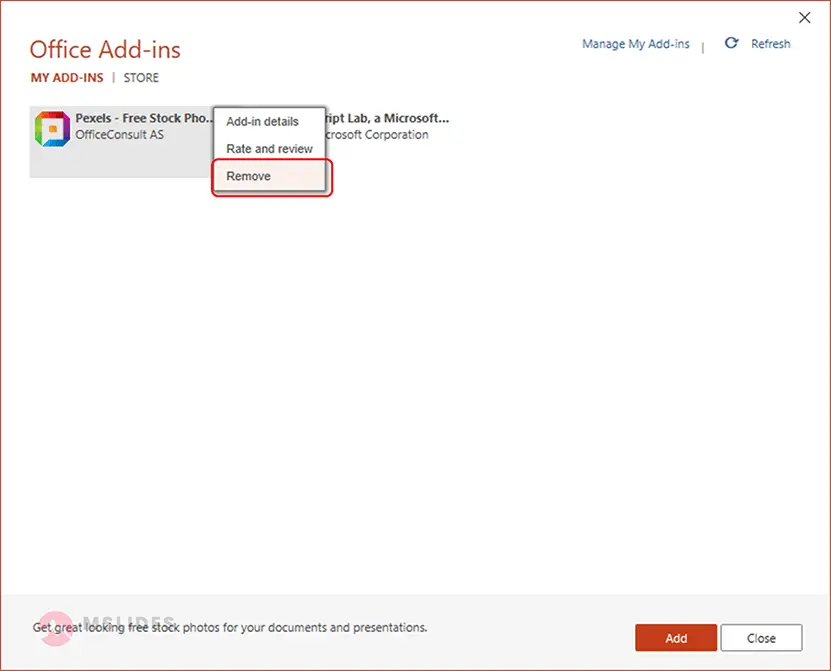
Method 01: Remove an add-in through the “My Add-ins” window
You should click the “Insert” tab and then click “My Add-ins”. After you click on the “My Add-ins” option, a pop-up window emerges, and you can find out all add-ins you have added from Office Store. Right-click on the add-in you want to remove, and then click “Remove”, the add-in will be removed.
Please note: If the add-in does not add any options to PowerPoint, you can only use this method to remove it.
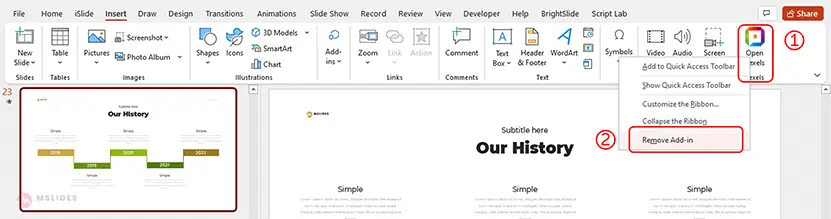
Method 02: Right-click on the options added by the add-in
If the add-in adds one or a few options to PowerPoint, you can right-click on one of these options added by this add-in and click “Remove Add-in” to remove this add-in.
Example 01: Remove the add “Pexels”
For the first example, I want to remove the add-in “Pexels”. It adds an option named “Pexels” to the Insert tab. So, we can right-click on the option and click “Remove Add-in”.
Example 02: Remove the add “Script Lab”
In the second example, I want to remove the add-in “Script Lab”. It adds a tab named “Script Lab” to the PowerPoint ribbon. So, we should click on this tab, and then right-click on either option in this tab and click “Remove Add-in”.

3.2 How to manage third-party COM add-in in PowerPoint?
You can open the “Manage other add-ins” window by clicking the dropdown arrow on the right side of the “My Add-ins” option.
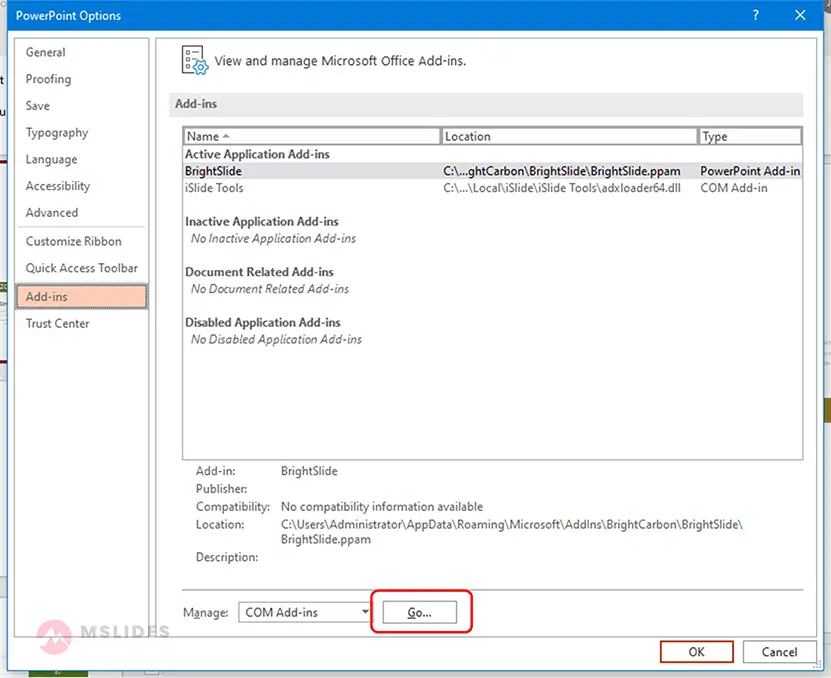
At the bottom of the window, you can find out a “Manage” section, you can click on “Go” to manage COM add-ins.
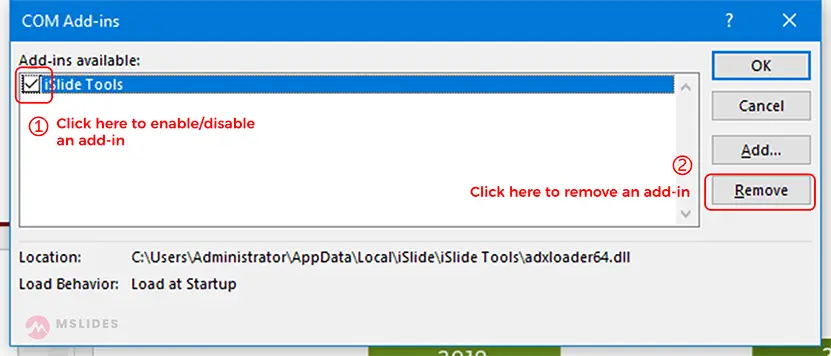
How to disable or enable a COM add-in in PowerPoint?
After you click on “Go”, another window will pop up. All COM add-ins are listed in this window and there is a tick box before each item. If you click on the tick box before an add-in, this add-in will be active, otherwise, it will be inactive. After you check all add-ins that you want to use, you can click “OK” to apply your setting.
How to permanently remove a COM add-in in PowerPoint?
If you want to permanently remove a COM add-in from PowerPoint, you should click on the name of the add-in, and click “Remove”. But in some situations, you can’t remove some COM add-ins using this method. You need to uninstall the related software to remove these add-ins.
According to my experience, we generally don’t need to remove a COM add-in. When we do not need a third-party COM add-in, we can just uncheck the tick box before the add-in to make it inactive. When we want to use it again, we can enable it.
3.3 How to manage third-party PowerPoint add-in in PowerPoint?
Like managing third-party COM add-ins, you should open the “Manage other Add-ins” window first.
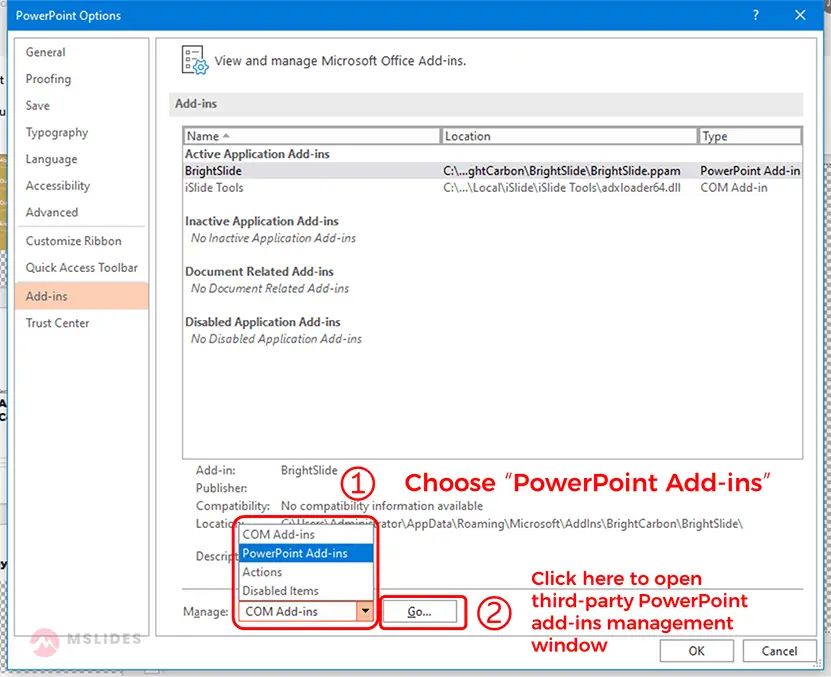
At the bottom of the window, click on the dropdown under the “Manage” section. Then, from the dropdown, click on “PowerPoint Add-ins “, and click on “Go”. The window to manage third-party PowerPoint add-ins pops up.
In the previous section of this article, we added a third-party PowerPoint add-in in this window. However, not only can you add new third-party PowerPoint add-ins in this window, but you can also be active, inactive, or remove a third-party PowerPoint add-in.
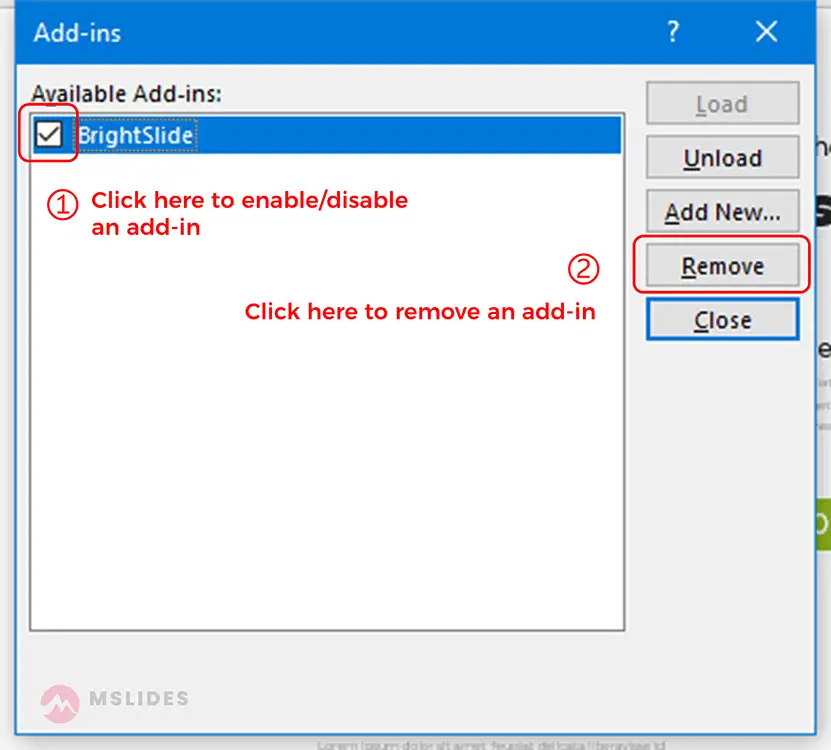
How to disable or enable a third-party PowerPoint add-in in PowerPoint?
You can’t disable or enable a PowerPoint add-in added from the Office Store. But you can disable or enable a third-party PowerPoint add-in in PowerPoint. If you check the tick box before an add-in, this add-in will be active, otherwise, it will be inactive.
Tips: When you enable a third-party PowerPoint add-in, you maybe need to wait a few seconds for loading the add-in.
How to remove a third-party PowerPoint add-in in PowerPoint?
Click the add-in you want to remove at first, and then click “Remove”. when you click the “Remove” option, the add-in will be removed instantly, so please consider whether you want to remove this add-in before clicking the “Remove” option.
4. Which add-ins should I install in PowerPoint?
There are more than 200 add-ins available for PowerPoint in Office Store. Which ones should we install and use? Firstly, there’s a category in Office Store called Editor’s Picks which displays a few highly rated selections. Work through the choices and pick the ones that fit your workflow. Secondly, to help you pick which add-in will boost your productivity the most, below are our top 3 picks for add-ins that you can use in your PowerPoint.
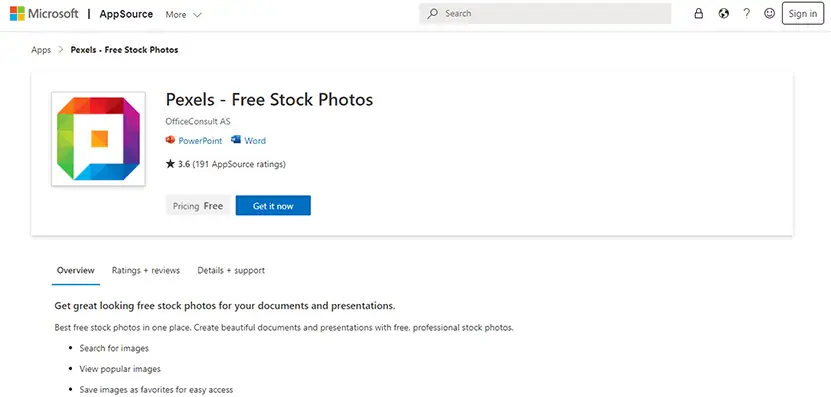
Pexels
Cost: Free
Key Benefit: Find free stock photos for your presentations.
Source: Office Store
Pexels is one of the best sites for free stock photography. This add-in is a handy shortcut to help you find the right kind of Creative Commons photo to go with your presentation.
Use the Search by the Color option to match the photo with the theme of your presentation.
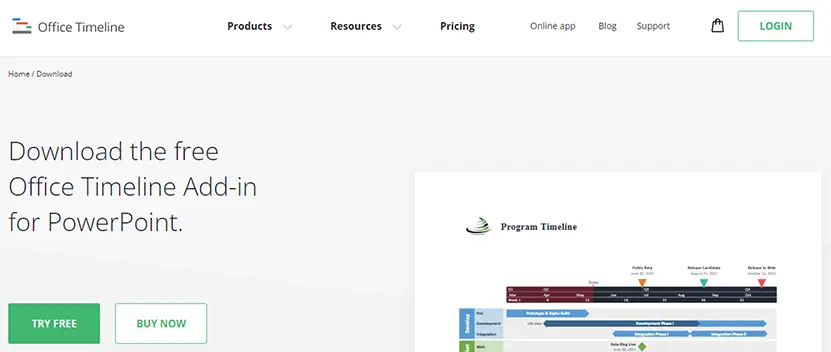
Office Timeline
Cost: Free and a Plus Edition for $59 per year
Key Benefit: Make professional timelines and Gantt charts quickly
Source: Free timeline makers that save you hours of work (officetimeline.com)
You might wonder about the utility of timelines and lightening your wallet for this add-in. PowerPoint is a powerful tool to present proposals to decision-makers. So, timelines and Gantt charts can be essential for every project office or classroom that wants to showcase a schedule or an event.
Office Timeline comes equipped with a wizard that takes the raw data and creates a beautiful timeline or a Gantt chart in under two minutes. You can do it manually too, but this popular add-in can save you a lot of time.
Office Timeline has a basic free version and an upgraded Plus Edition with an annual license fee.
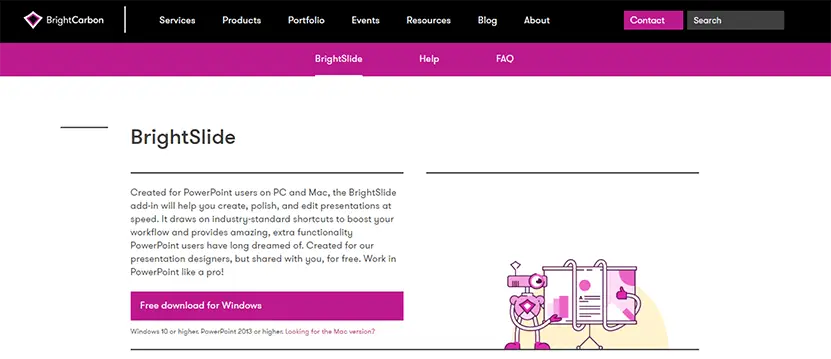
BrightSlide
Cost: Free
Key Benefit: There are many useful options I often use in Brightside.
Source: BrightSlide | PowerPoint productivity add-in | BrightCarbon
Created for PowerPoint users on PC and Mac, the BrightSlide add-in will help you create, polish, and edit presentations at speed. It draws on industry-standard shortcuts to boost your workflow and provides amazing, extra functionality PowerPoint users have long dreamed of. It is created for presentation designers, but you can use it for free. You can work in PowerPoint like a pro with this add-in!
5. Conclusion
Although It’s so easy to install an add-in in PowerPoint and there are many benefits to using add-ins in PowerPoint, you should not install too many add-ins. There are some tips you should remember when you install and use add-ins.
- Too many add-ins will make the PowerPoint software run slower. So, you should install the add-ins you really need. When you do not need an add-in anymore, disable it or remove it Permanently.
- Some add-ins do not add any tabs or options to any tabs. You need open the “My Add-ins” window to use or remove it.
- If you can’t find out where to use the add-in you just install it from Office Store, go to the “My Add-ins” window and choose the add-in and then click “Add”. If this add-in adds a tab or an option, PowerPoint will open the tab, or the tab includes the option and give you a hint.
- When you need to download and install a third-party paid add-in, you need to confirm that the plugin is suitable for your current PowerPoint software first. Secondly, you should try it for a few days to check if the add-in is the one you really need.
If you like this tutorial, please share it with your friends, I would appreciate it.
Have any questions? Feel free to leave a comment!