

We often need to copy our presentation to another device or share it with others. So, it is very important to avoid fonts not displaying correctly in PowerPoint. Besides, we will experience this problem if we open our presentations on other devices. We may meet this problem when you receive presentations from others too.
We always need to make sure that all texts display correctly. Especially we make presentations for our customers. So, how can we solve fonts not displaying correctly in PowerPoint when we copy or share a presentation?
PowerPoint software provides a way to embed fonts in presentations. Besides, there are 3 other ways to avoid fonts not displaying correctly in PowerPoint. So, There are 4 ways in total to solve fonts not displaying correctly in PowerPoint:
- Embed fonts in PPTX files.
- Copy the fonts used in your presentation.
- Convert text to shapes.
- Convert text to pictures.
In this article, we’ll cover these four methods in detail. Besides, we’ll compare these methods and give you some suggestions for practical application.
The template used in the article is totally free. Download it now!
1. Embed fonts in PPTX files
In PowerPoint, you can embed fonts into our PPTX files to avoid fonts not displaying correctly. Follow these steps:
Step 01. Click on the “File” tab

Step 02. Click the “Options” button in the lower-left corner
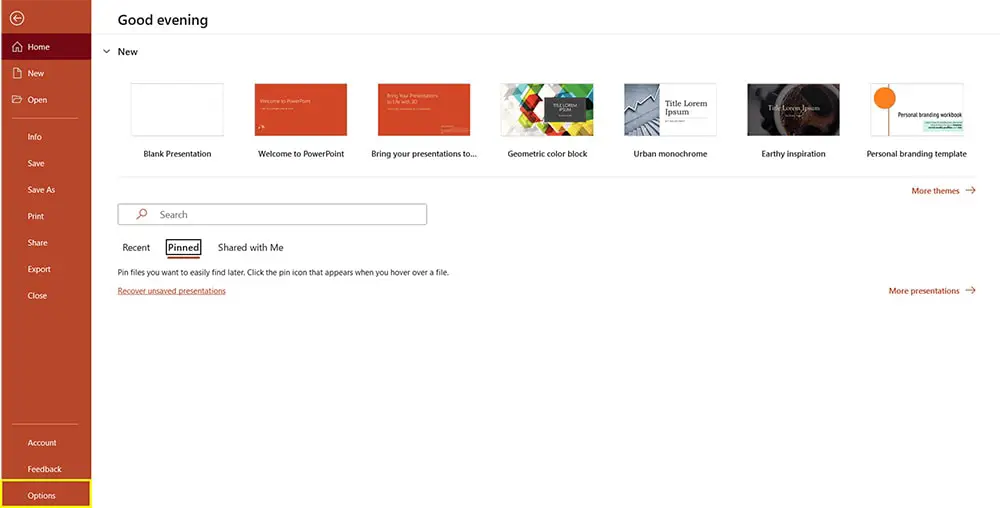
Screenshot 02 – The location of the Options button
Once clicked, the PowerPoint Options window pops up.
Step 03. Click the “Save” tab on the left column
There is an option named“preserve fidelity when sharing this presentation:”. I mark it with a red rectangle in the following picture.
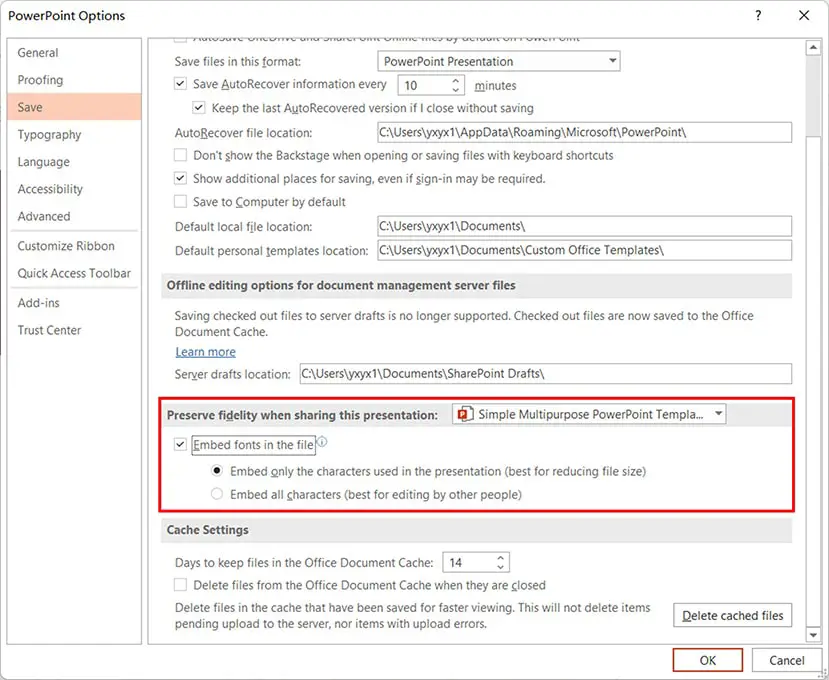
You can only embed the characters used in this presentation. Or you can embed all characters. If you want to continue editing this file on another device, you’d better choose to embed all characters. Please note this setting will make your presentation larger. So opening this file will be significantly slower.
It’s simple to operate and does not need extra operations when opened.
But, this method has several drawbacks:
- The file size of the presentation will increase significantly, which is not good for sharing.
- For some special fonts, you may experience situations where you cannot save the font with your presentation.
You can check this post to learn more about embedding fonts in PowerPoint.
2. Copy the fonts used in your presentation.
To solve fonts not displaying correctly in PowerPoint, you can copy the sued fonts with your presentation. And then, you need to install the fonts before opening the presentation on another device.
Before you copy fonts, you first need to know which fonts we have used in our presentation. If you use several fonts and don’t clear exactly which fonts you have used, you can find them out in PowerPoint.
You can follow these steps to copy the fonts used in your presentation:
Step 01: Find out the fonts used in your presentations
Click “Home” and click the arrow next to the “replace” option, then click on the “replace fonts” option.

After clicking, a dialog box to replace the font appears.
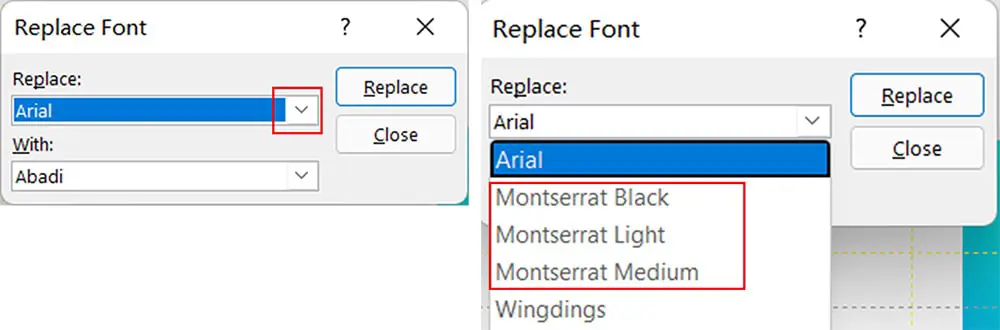
Click the arrow on the right side of the pane below “Replace:“. And then all the fonts used in the presentation appear.
But, you don’t need to copy all the fonts that appear here. Some of these fonts are system fonts, such as Arial and Wingdings. All you need to do is copy the non-system fonts. For my presentation, I only need to copy 3 fonts. They are Montserrat Black, Montserrat Light, and Montserrat medium.
Step 02: Copy the fonts used in your presentation
Once you find out all the fonts used in your presentation, you’ll need to copy them with your presentation. But where to copy these fonts?
If you can find the installation files of these fonts, copy them. If you can’t find the installation files of these fonts, you can copy these fonts into the Fonts folder of the Windows system.
In Windows, the path of the Fonts folder is:
C:\Windows\Fonts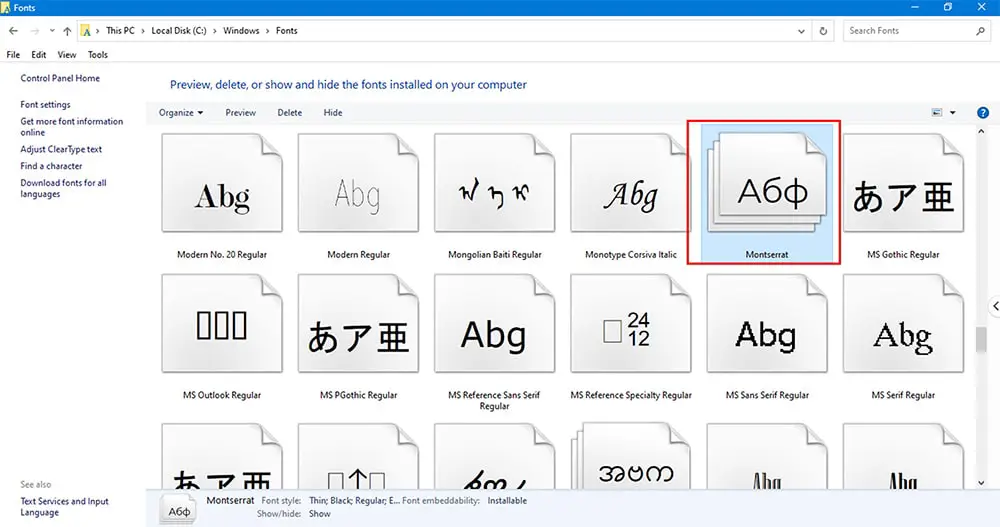
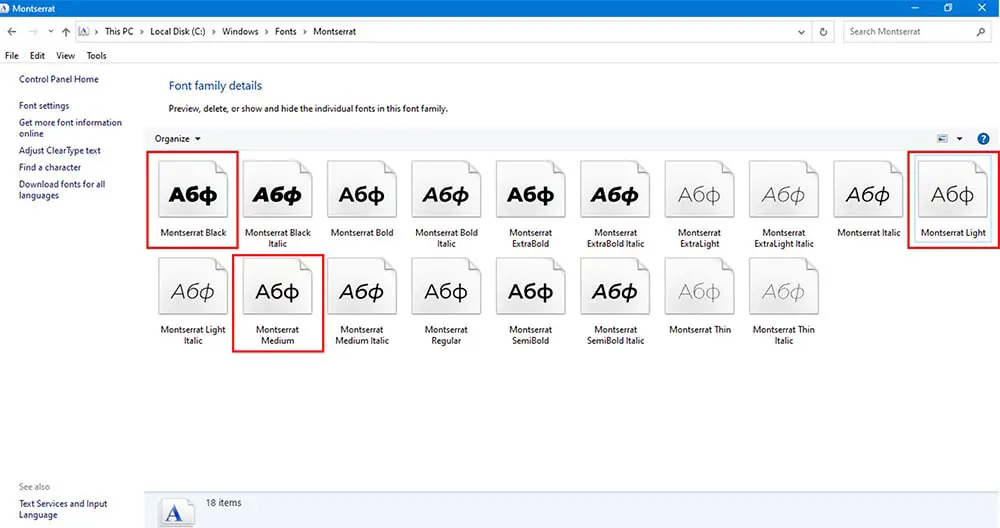
Find the fonts you need and copy them. If you only need to copy a few fonts in a font family, you can double-click to open the font family. And then copy the fonts you need in this font family.
You can create a new folder to copy both your presentation and fonts to it. If you need to send the presentation to someone else, you’d better package it as a zip file.
Before you open your presentation on a new device, you should install these fonts first.
This method has many advantages:
- The file size of your presentation will not increase. So you can open your presentation quickly.
- Suitable for almost all situations like opening your presentation in another system.
But, there is one drawback of this method. The operation is complex and you need to install fonts on other devices. Especially if you need to send the presentation to your customers, you need to explain to them that he needs to install the fonts.
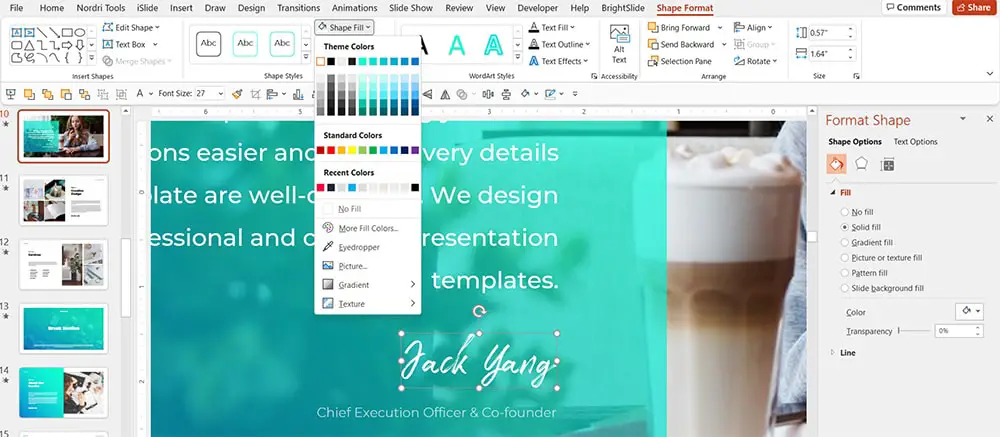
3. Convert text to shapes.
If you use a font in your presentation for a few texts, you can convert these texts to a picture or shape. My suggestion is to change these texts to shapes. Because shapes are free to change color, and pictures are not.
So, how to change texts to shapes?
You can follow these steps:
Step 01. Find out the texts that need to be converted
In my situation, I used a font called “Take Easy“. But I used it only once throughout my presentation, so I converted this text to a shape.
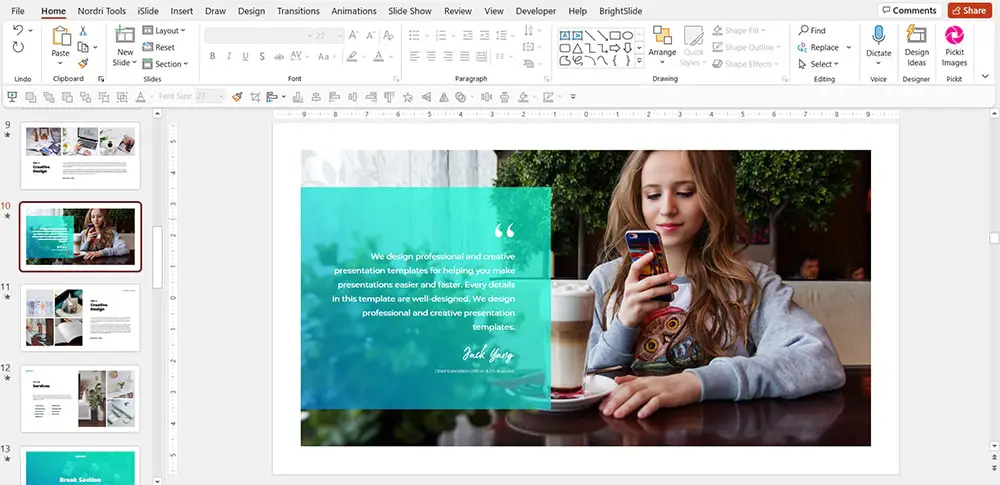
Step 02. Insert a shape
In general, you can insert a rectangle, and of course, you can also insert other shapes. You should make sure that the shape completely covers the text that needs to be converted.

Step 03:merge the shape with the text
Choose the shape and the text. Click the tab named “shape format”. Then click on “merge shape” -> “intersect”.
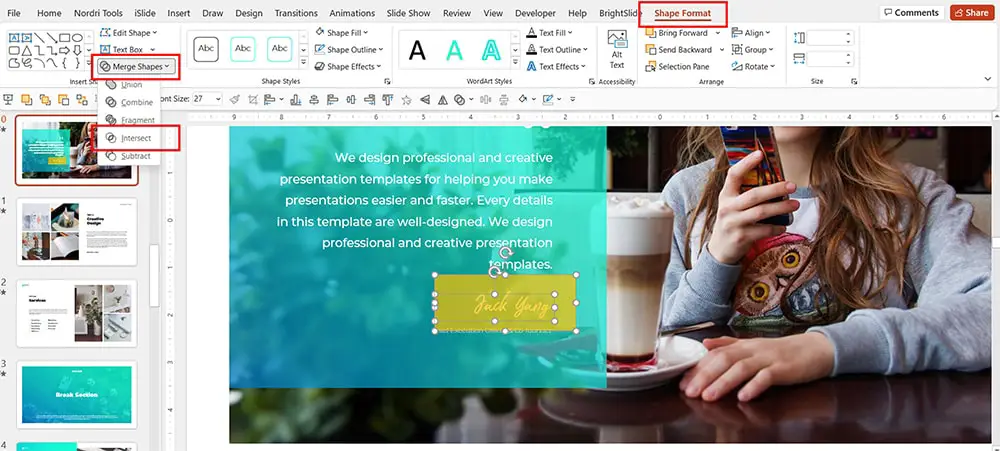
At this point, you’ve already changed the text to a shape. And then you need to modify the border and color.
Note that after you change the text to a shape, the text will not be editable. So, you should not use this method if you need to continue modifying the text later.
4. Convert text to pictures
When you only use a font once or a few times in your presentation, we can convert these texts to pictures too.
You can follow these steps:
Step 01. Choose the text box or the text in the textbox, right-click and then click Cut, or press Ctrl+X
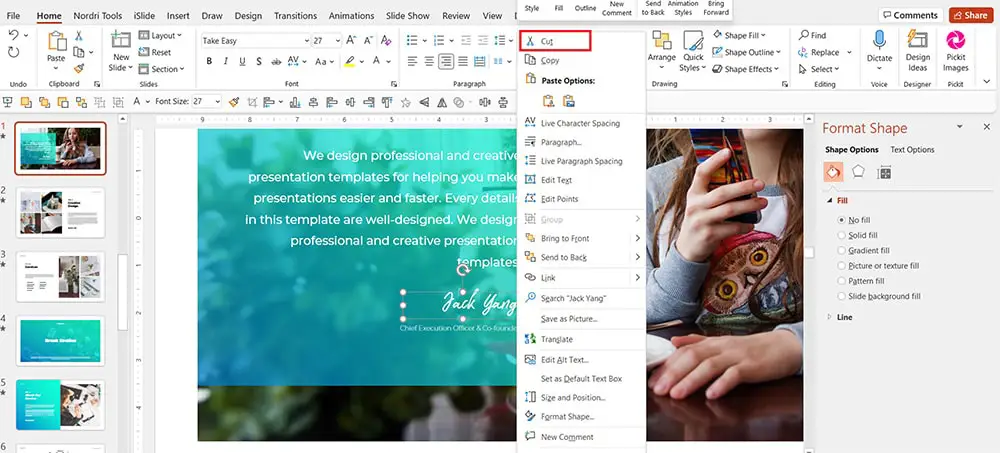
Step 02. Right-click on this slide and paste the textbox as a picture.

At this point, you have converted the textbox to a picture. And then you can adjust and resize the picture as you want.
Note that when you convert text to a picture, the text will not be editable, and the text will not be able to change colors.
In addition, when you convert text to a picture and zoom this picture, it will be blurred. So, I do not suggest you use this method.
5. Conclusion
I have shown you four methods to avoid fonts not displaying correctly in PowerPoint. These methods have advantages and disadvantages. To better apply these methods, I’ve made a detailed comparison table. It illustrates the advantages and disadvantages of these four methods:
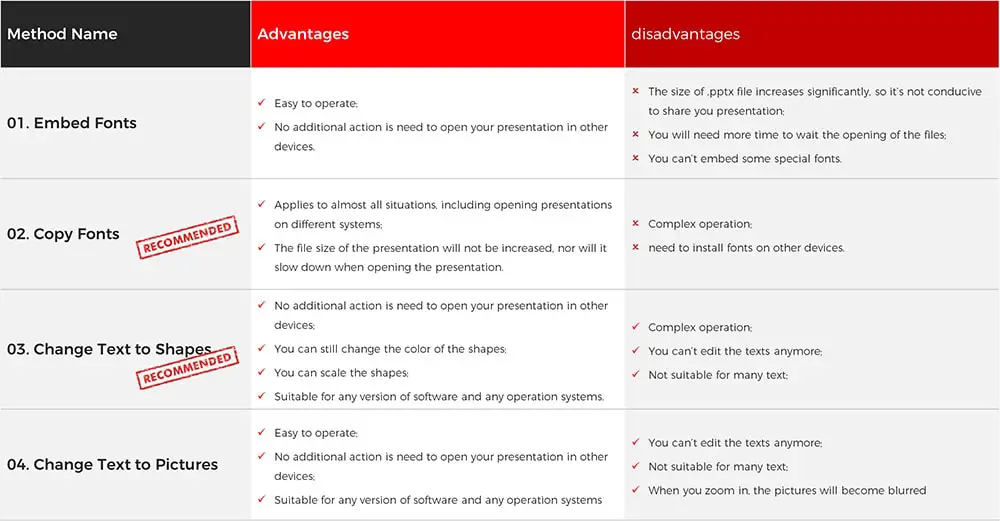
Besides, I would like to give you some advice:
- If you want to continue editing your presentation on another device, I suggest you copy all used fonts with your presentation and install them on other devices. So that even if you open them on other systems (such as macOS) or applications (such as Keynote), all fonts will be displayed correctly.
- If you use a font for only a few texts and don’t need to edit these texts anymore, I recommend you convert the text to shapes.
- when you need to send a presentation to a customer, you can embed the font in your presentation. But, you’d better open it on another device for testing before sending it to your customer. If you can’t embed some fonts, you’ll need to copy these fonts or convert the texts using these fonts to shapes.
Have any questions? Feel free to leave a comment!